Version control
Learning objectives:
This page introduces workflows for version control using GitHub.
- Version control: What it is and why it matters.
- Git: How it works and common platforms.
- Setting up a GitHub repository: How to create one from scratch.
- Cloning the repository: How to copy a repository to your local machine.
- Working with Git from your development environment: An alternative to using the command line.
- Creating a branch and pushing changes: How to work on a branch and sync changes.
- GitHub organisations: What they are, why use them, and how to set one up.
Relevant reproducibility guidelines:
- NHS Levels of RAP (🥉): Code is version controlled.
Version control
Version control is a way to track changes to your documents over time. You can…
- Track changes to files: see what changes, when it changed, and who changed it.
- “Roll back” to earlier versions of your files if something goes wrong.
- Work simultaneously with others without overwriting each other.
- Try new ideas without risking your main work.
- Back up and share work online using platforms like GitHub.
This is super handy, whether you’re working by yourself or in a team!
💡 Recommendation: Use version control from the start of the project.
Git
The most popular version control system is Git.
When using Git, we refer to our work as a repository. This is simply a folder containing your project files, as well as a special hidden .git/ folder which stores all the version history.
We take snapshots of the files at specific points in time, and these are called commits.
Git can just be used on your local computer, but most people will use an online platform to store their repositories. The most popular options are:
- GitHub - https://github.com/.
- GitLab - https://gitlab.com/.
- BitBucket - https://bitbucket.org/.
This tutorial will focus on GitHub as it is the most widely used and beginner-friendly.
Setting up a GitHub repository
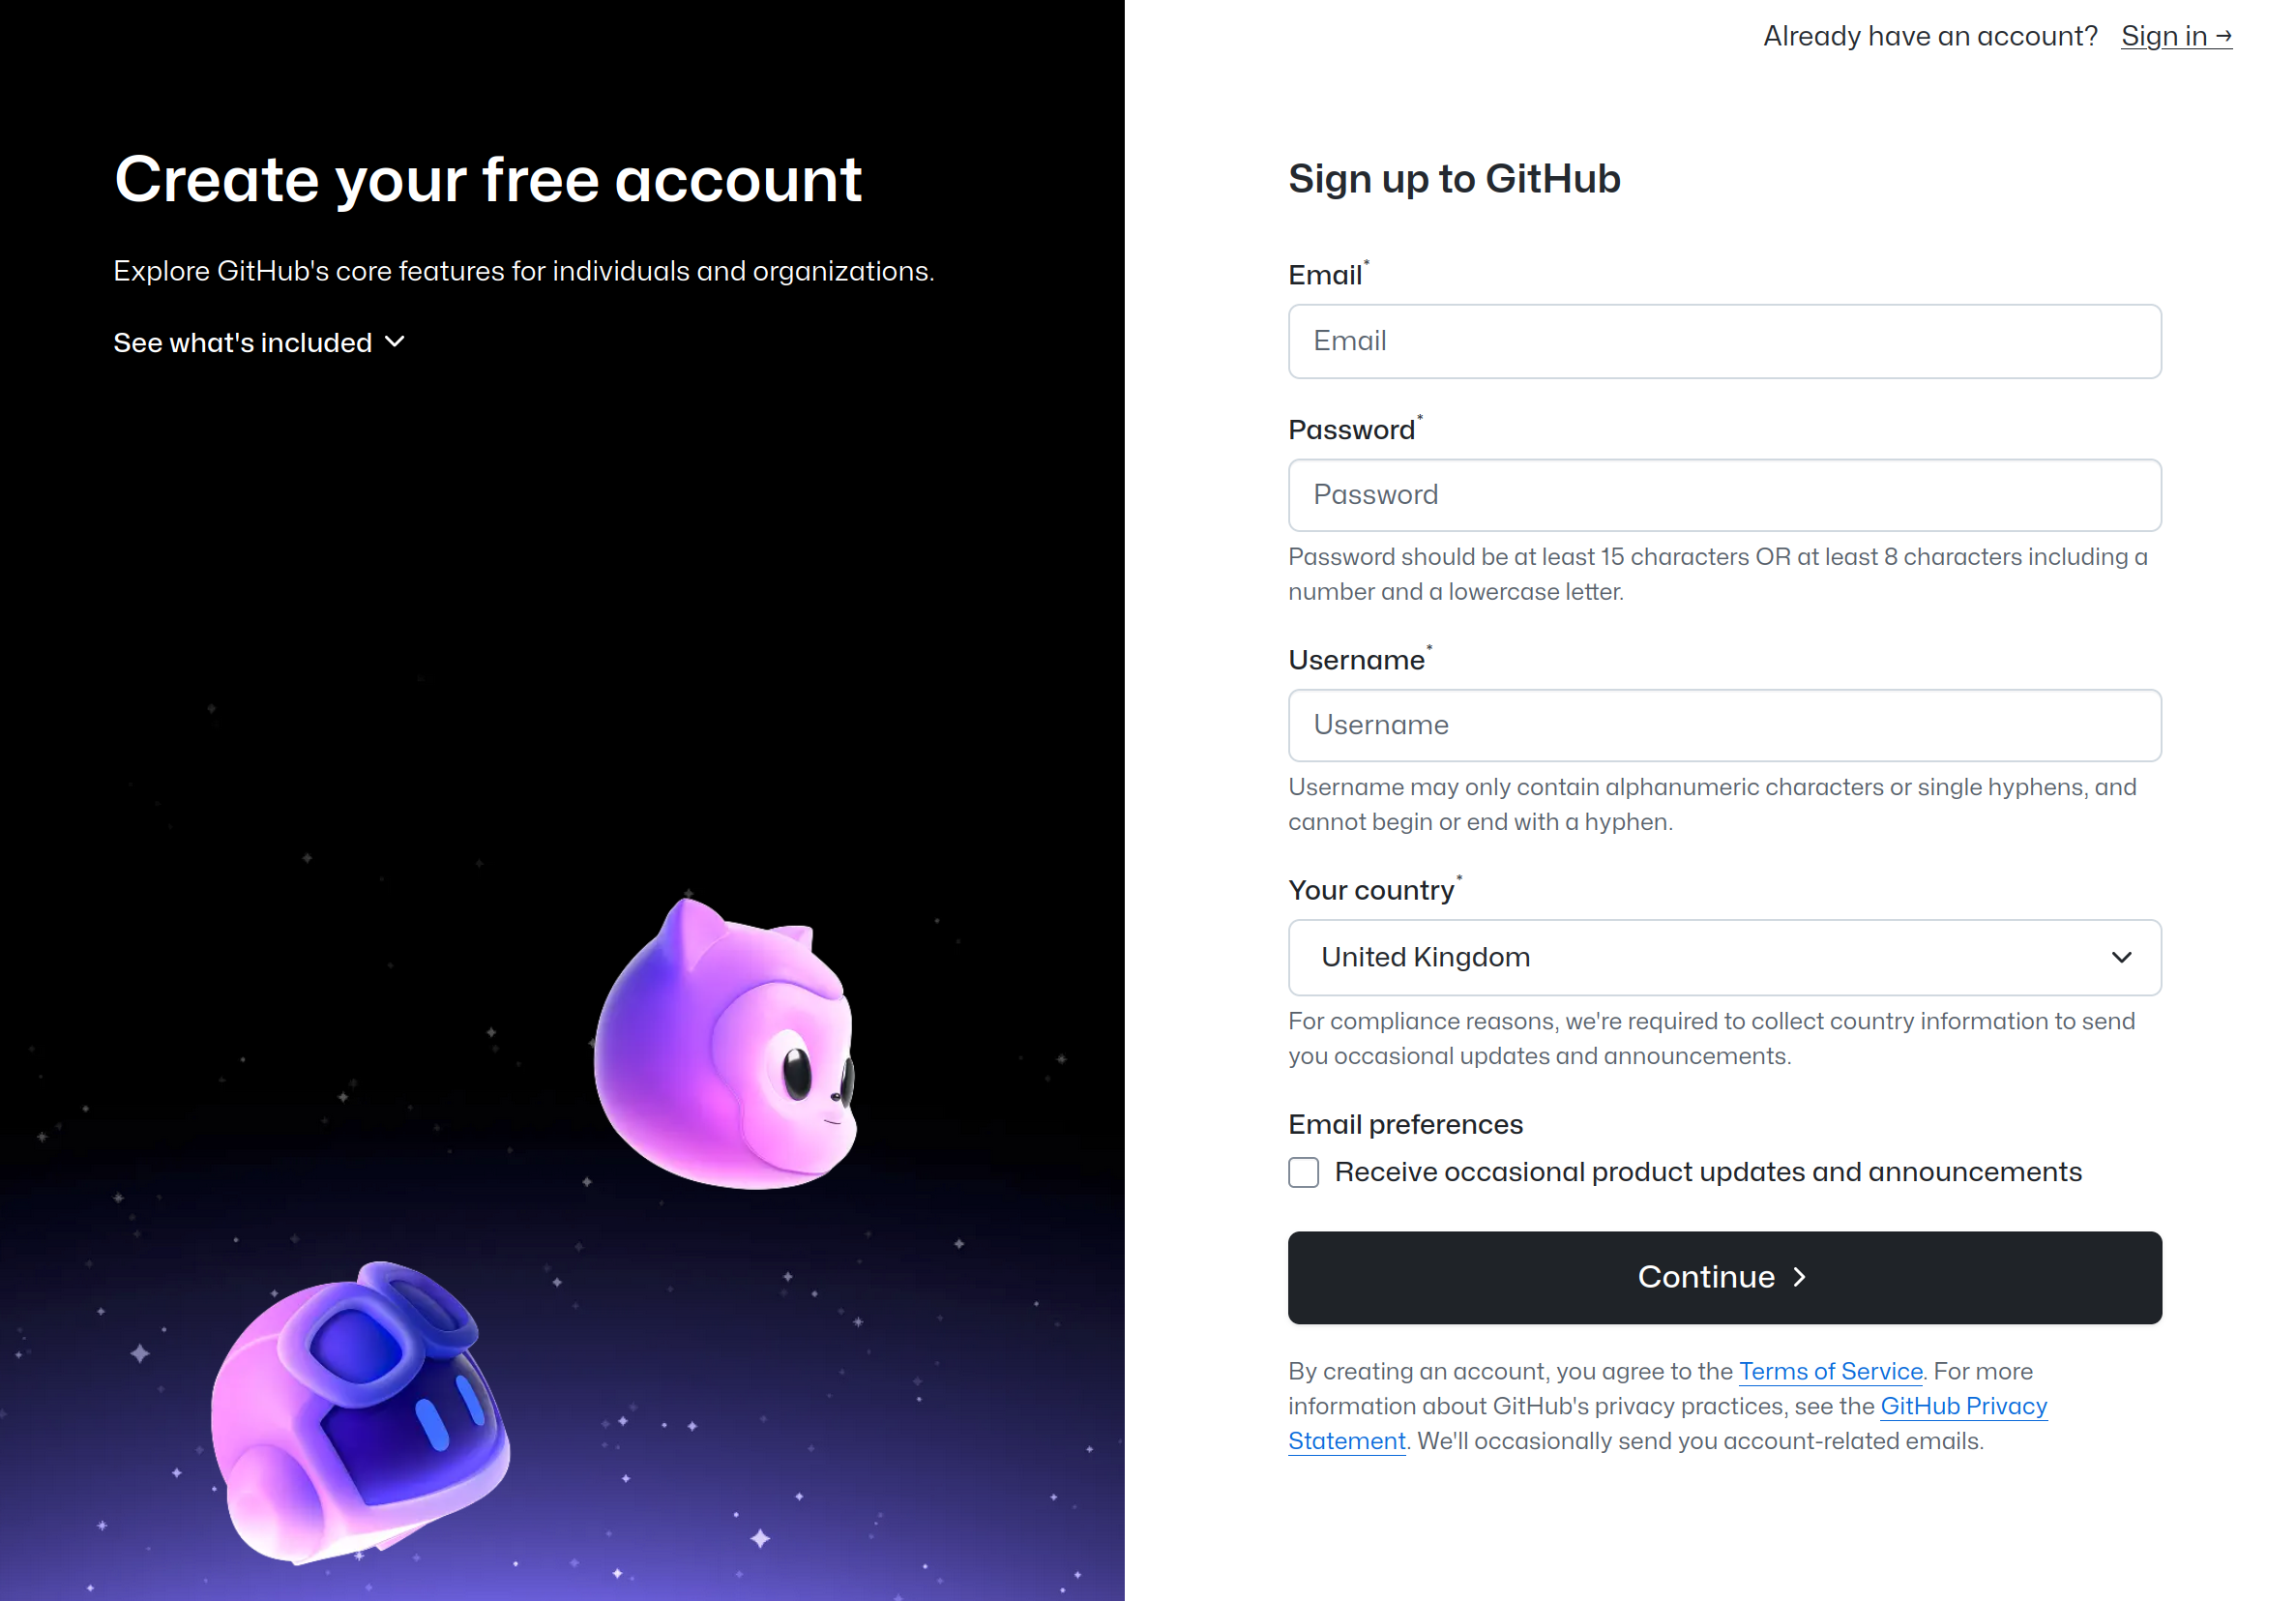
1. Create an account
Go to https://github.com/signup and sign up with your email and a username.
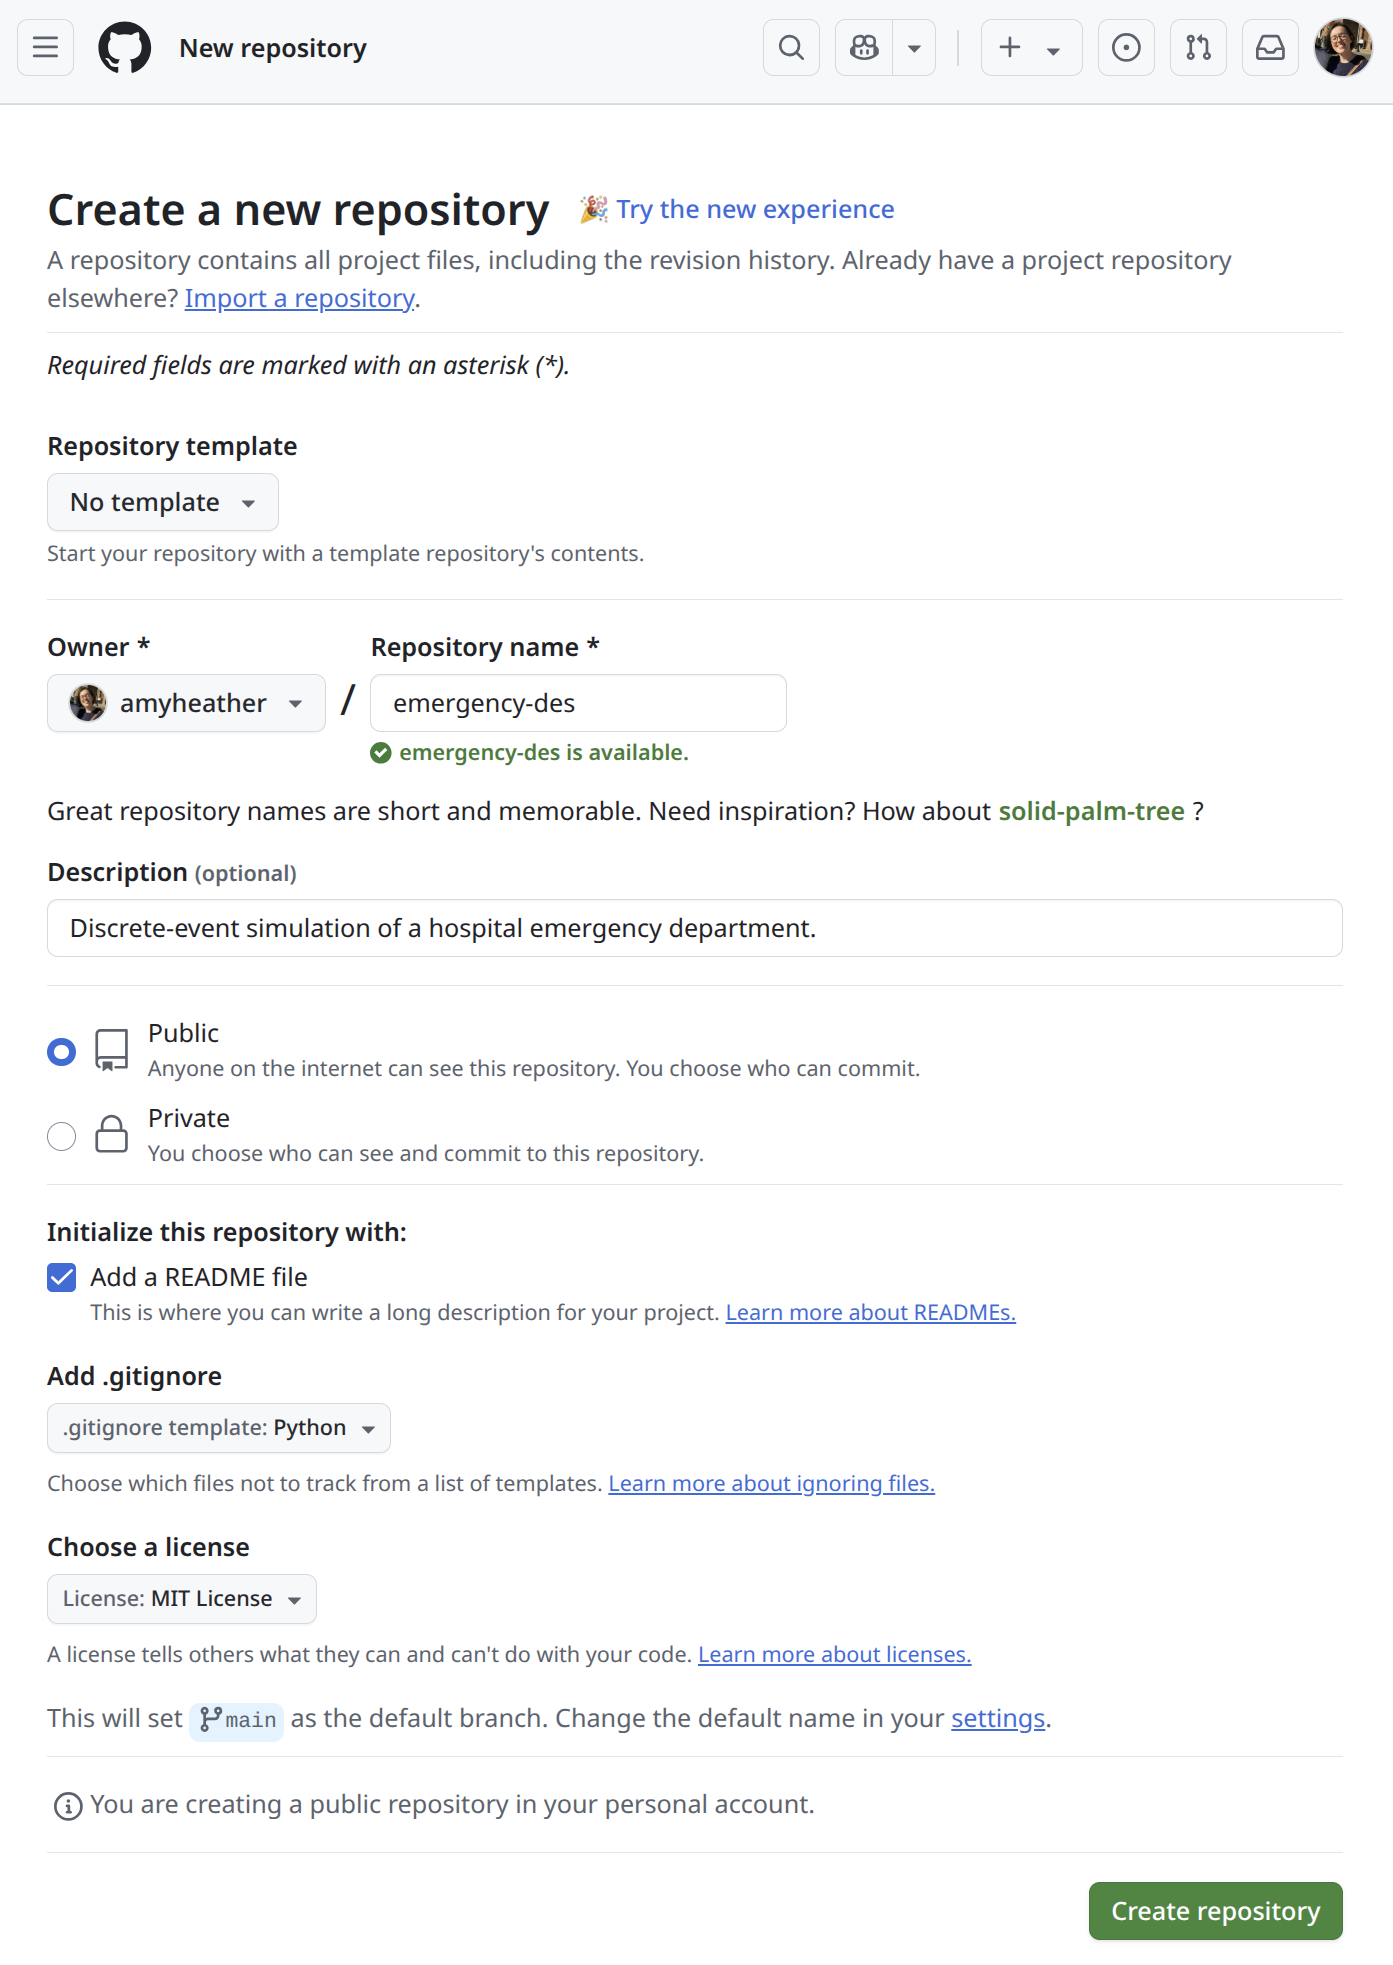
2. Create a new repository
Click the “+” button in the top right corner, and select “New repository”.

Next, fill out the form to create your repository.
It’s best to create a separate repository for each project to keep your code organised and easy to manage. For instance, if you’re experimenting with both Python and R tutorials, set up a different repository for each one. Similarly, when developing models for different systems - such as one predicting emergency department wait times and another analysing the impact of a vaccination programme - it’s best to keep each in its own repository.
A simple, illustrative example is shown below:
- Repository name: e.g. des-rap-python
- Repository name: e.g. des-rap-r
Description: e.g. Repository for working through examples from the des-rap-book.
Visibility: Choose whether to make the repository public (anyone can see it) or private (only visible to you and people you invite).
README: Select “Add a README file”, which will create a blank README we can populate later (see the documentation page).
- .gitignore: Select the python .gitignore template. This will create a
.gitignorefile in your repository that tells Git which files not to track.
- .gitignore: Select the R .gitignore template. This will create a
.gitignorefile in your repository that tells Git which files not to track.
- Licence: Select an appropriate licence for your repository (see the licensing page for more information and advice).

We would encourage you to make your work open access - i.e. creating a public GitHub repository, and using a permissive open licence (e.g. MIT). As described by The Turing Way, benefits to making your work open include:
- Sharing: Easy to reference and share in papers and presentations.
- Transparency: Clearly shows how you conducted your analyses.
- Reproducibility: Others can verify and reproduce your results.
- Quality: Knowing it’s public encourages good practice.
- Reuse and learning: Others can learn from and build on your work, reducing research waste.
- Extends impact: Your work can continue to have impact after the project ends. This could include for you, if you change jobs, and want to be able to look back on old code!
- Collaboration: Creates opportunities for collaboration, if others come across your code and are interested in working together.
- Funder requirements: For research projects, some grants now mandate open code.
Including a license and citation instructions enables others to use your code while giving you credit.
That said, it’s your code and your choice - if you have specific concerns or proprietary work, a private repository is always an option.
Cloning the repository
You have created a remote repository on GitHub - we now want to clone it, which means we create a local copy on your computer, and can sync between the local and remote repositories.
1. Get the url
On the main page of you repository, click the <> Code button, then copy the HTTPS url.

2. Clone the repository
Depending on your operating system:
- Open the terminal (for Linux or Mac).
- Open Git Bash (for Windows). If you’re new to Git Bash, check out 4-minute video tutorial on installing Git Bash.
Navigate to the folder where you want the project to be stored, then run the following (using your copied url):
git clone https://github.com/your-username/your-repo-name.gitFor example:
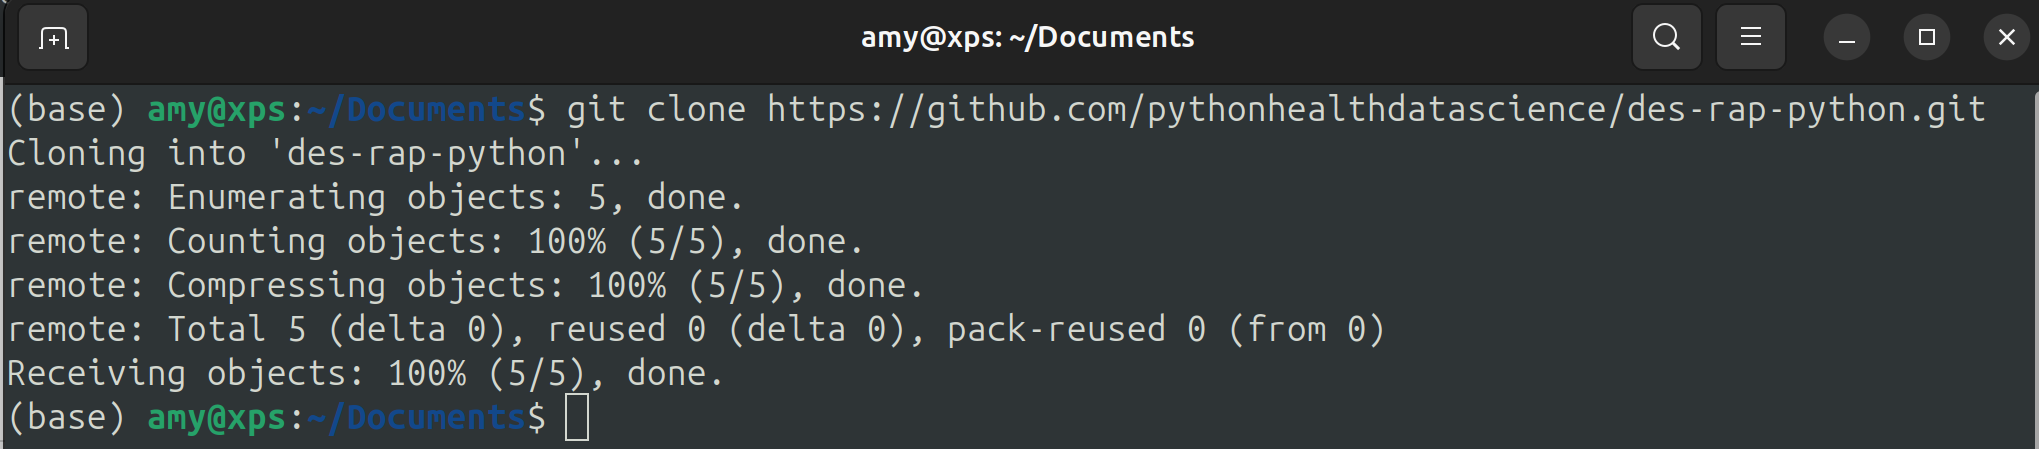
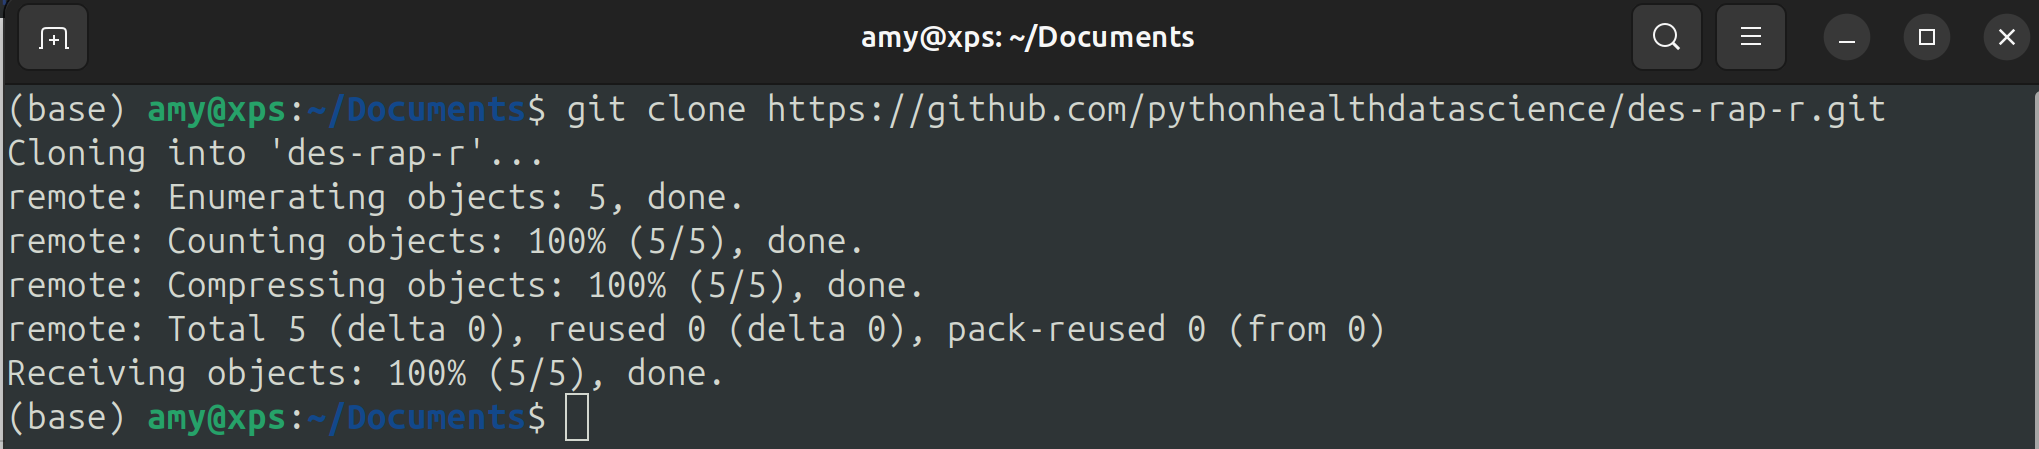
This will create a local copy of your repository.
Working with Git from your development environment
Once you’ve cloned your repository, you can manage Git directly from your development environment, instead of using the command line for every step.
For example, VSCode is a popular option in Python which offers built-in Git integration. To view the Git options, click on “Source Control” in the activity bar.
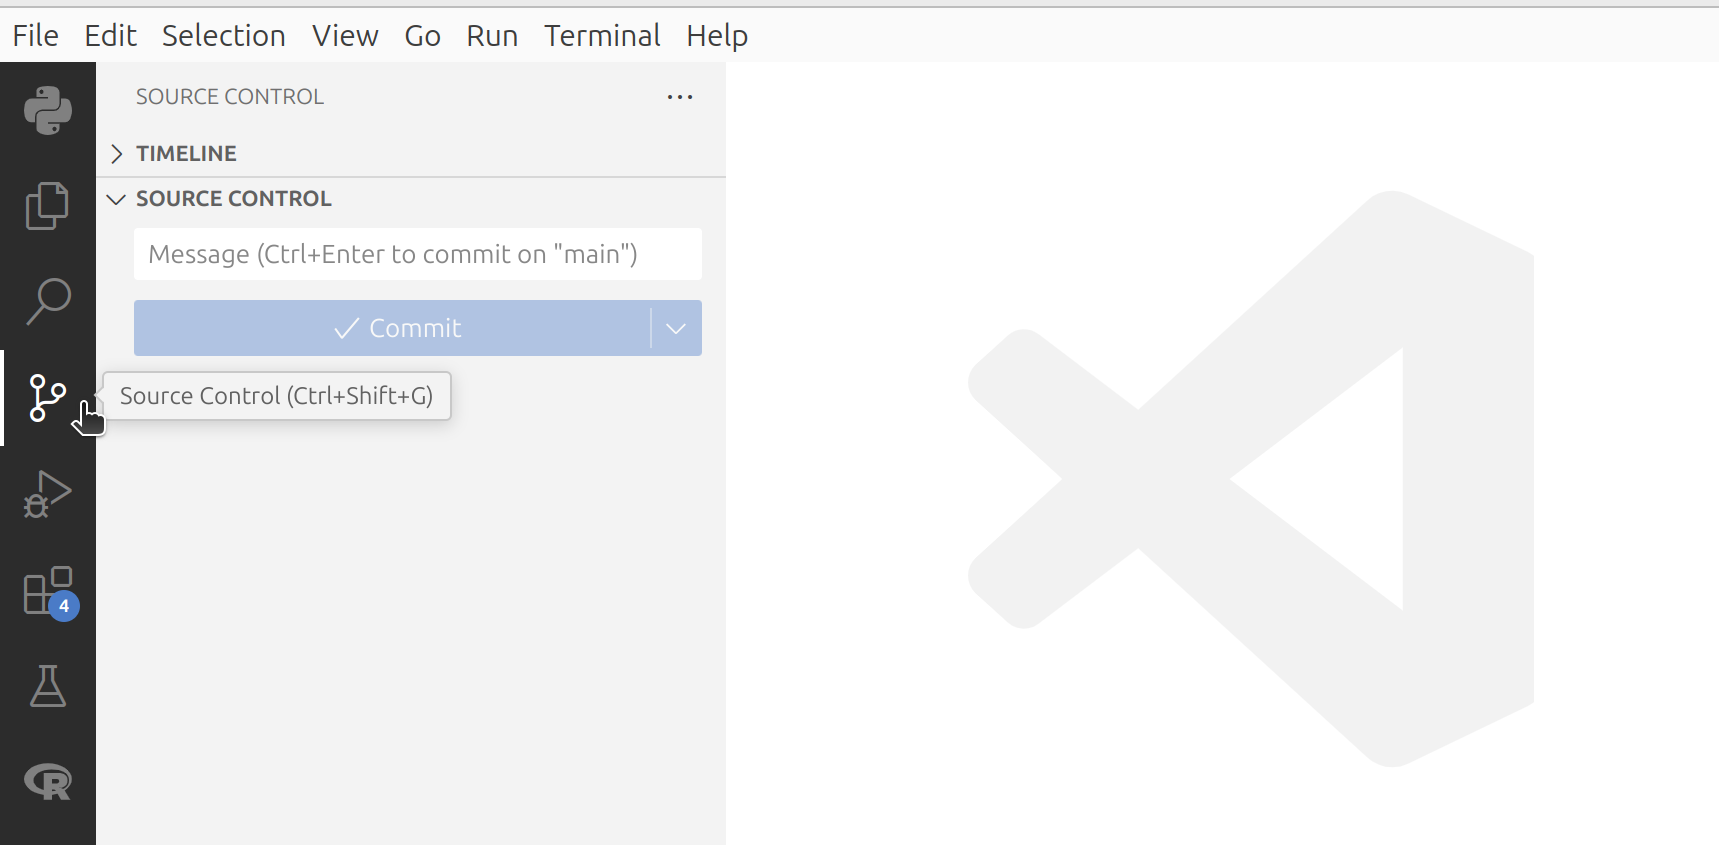
From here you can view commit files, view diffs, change branches, and push/pull to GitHub without leaving VSCode.
For example, RStudio is a popular option in R which offers built-in Git integration. When you open a folder connected to a Git repository in RStudio, a Git tab appears in the top-right pane.

From here you can view commit files, view diffs, change branches, and push/pull to GitHub without leaving RStudio.
Note: In the examples below, we’ll show the command line approach as it is universally applicable for most Git operations. However, when it comes to merging branches, we use the GitHub website as it enables us to use the pull request workflow. You are always welcome to use your preferred development environment for staging, committing, and pushing—these all use the same underlying Git process.
Need help? Check out this 15-minute tutorial on using git and GitHub in VSCode.
Need help? Check out this 10-minute tutorial walks through connecting an RStudio project to git and GitHub.
Creating a branch and pushing changes
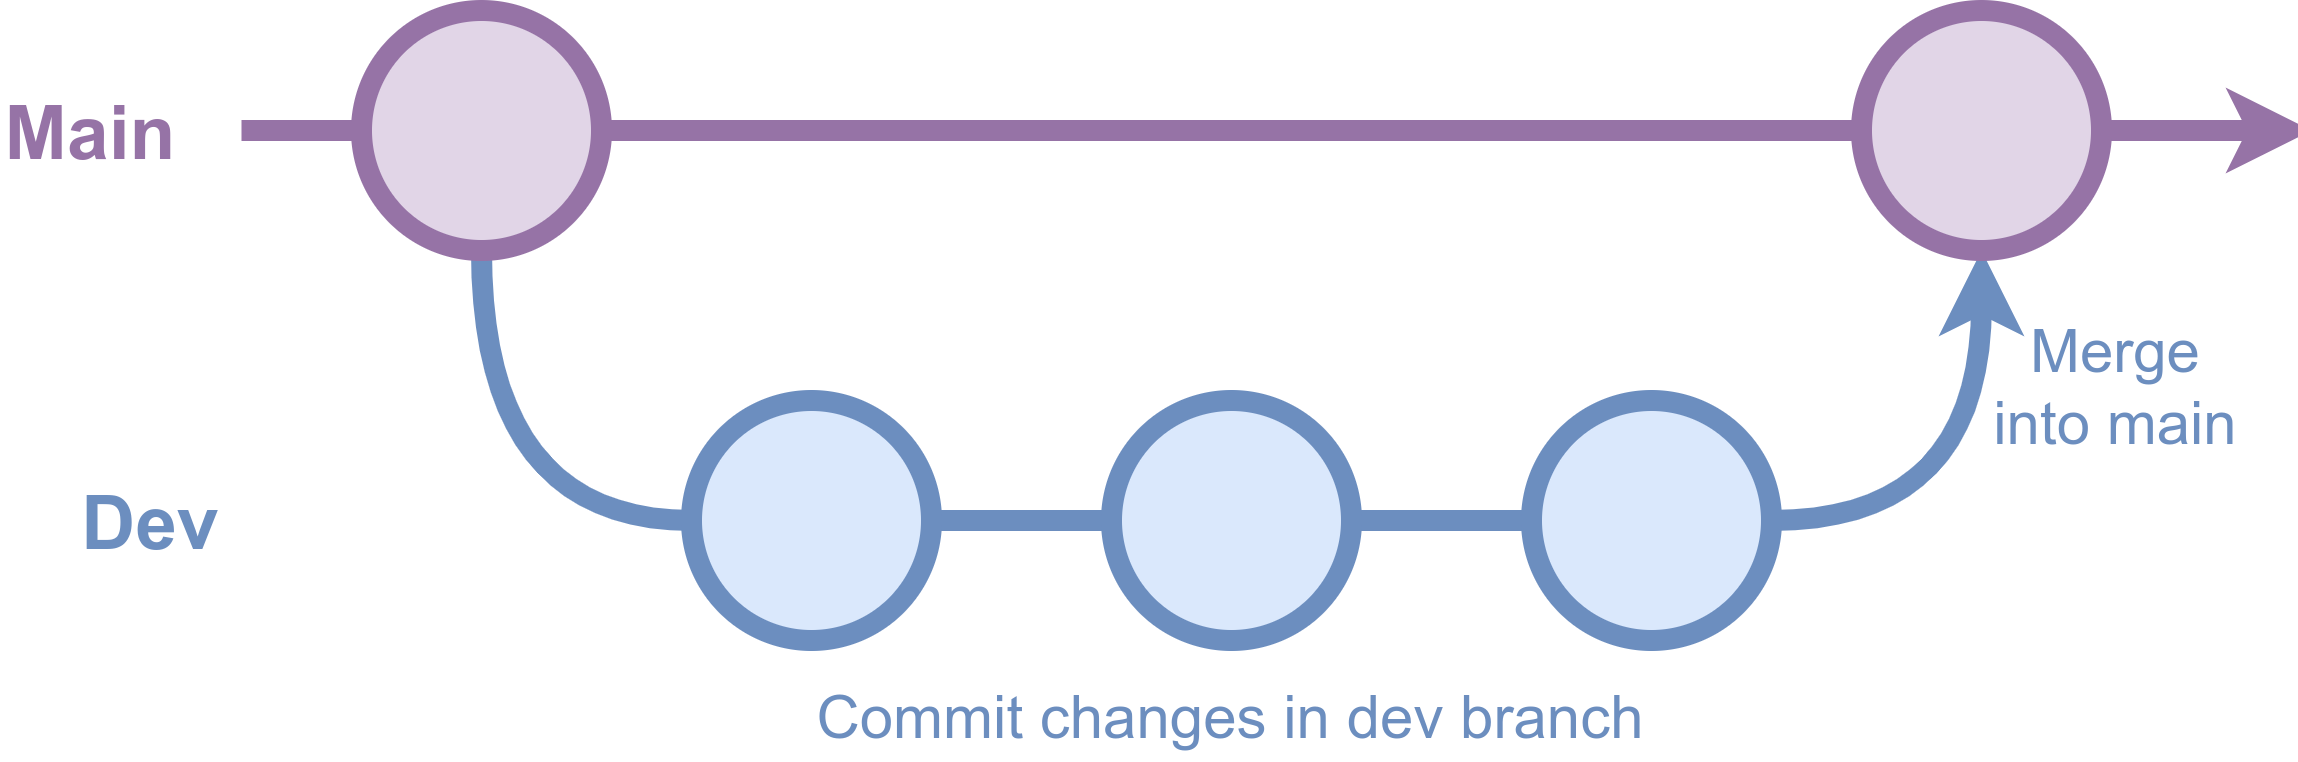
It is best practice to work in branches. A branch is like a separate workspace where you can safely experiment with changes without affecting the main project.
As in the diagram below, you can make several commits in this branch, and when you’re ready, merge back into the main project (e.g. when new feature complete, or reached a stable point where everything is working properly).
This is valuable even when you’re the only person working on the repository - but with multiple collaborator, becomes essential! Every person should work on their own branch.
To work in a branch and push changes…
1. Create a branch
Open your terminal or Git Bash, and make sure your current working directory is your Git repository. To create a new branch (here, named dev), then run:
git branch devTo move into this branch:
git checkout devYou should see a message “Switched to branch ‘dev’”.
We can add this branch to the remote GitHub repository by running:
git push -u origin dev2. Make some changes
This could be any changes to code, documentation or other artefacts in the repository. So we can test this out, let’s make a simple change to our README -
Before:
# des-rap-python
Repository for working through examples from the des-rap-book.
# des-rap-r
Repository for working through examples from the des-rap-book.After:
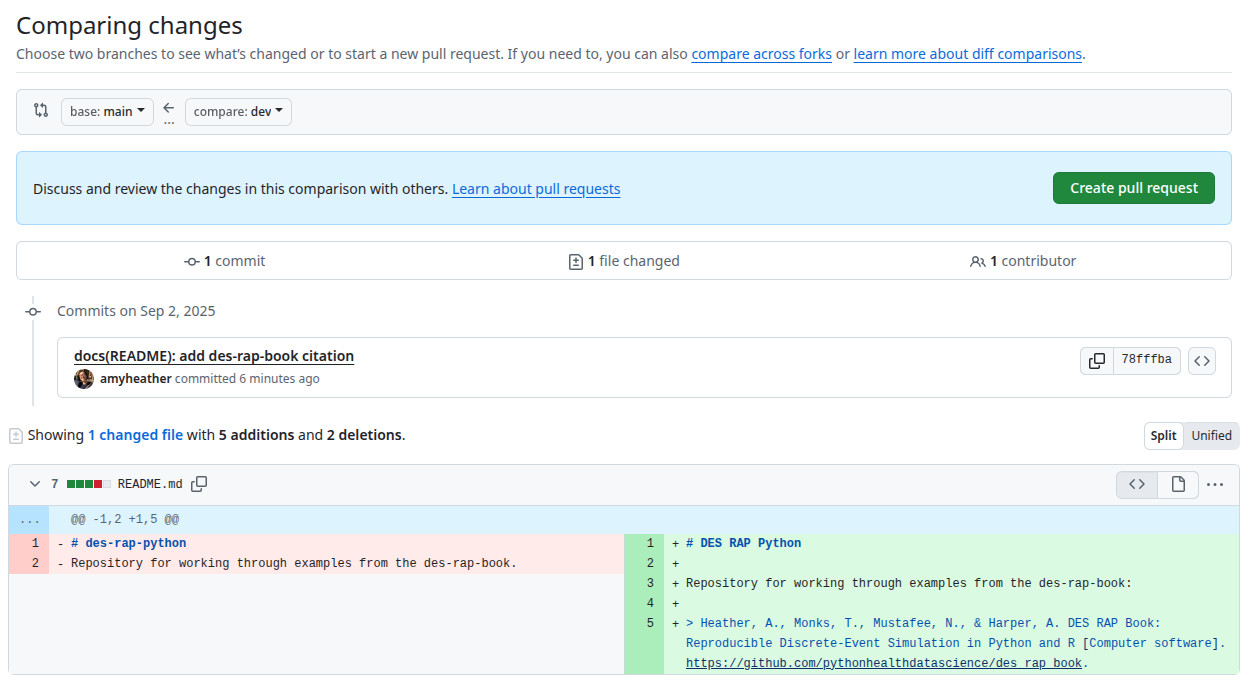
# DES RAP Python

Repository for working through examples from the des-rap-book:

> Heather, A., Monks, T., Mustafee, N., & Harper, A. DES RAP Book: Reproducible Discrete-Event Simulation in Python and R [Computer software]. https://github.com/pythonhealthdatascience/des_rap_book.
# DES RAP R
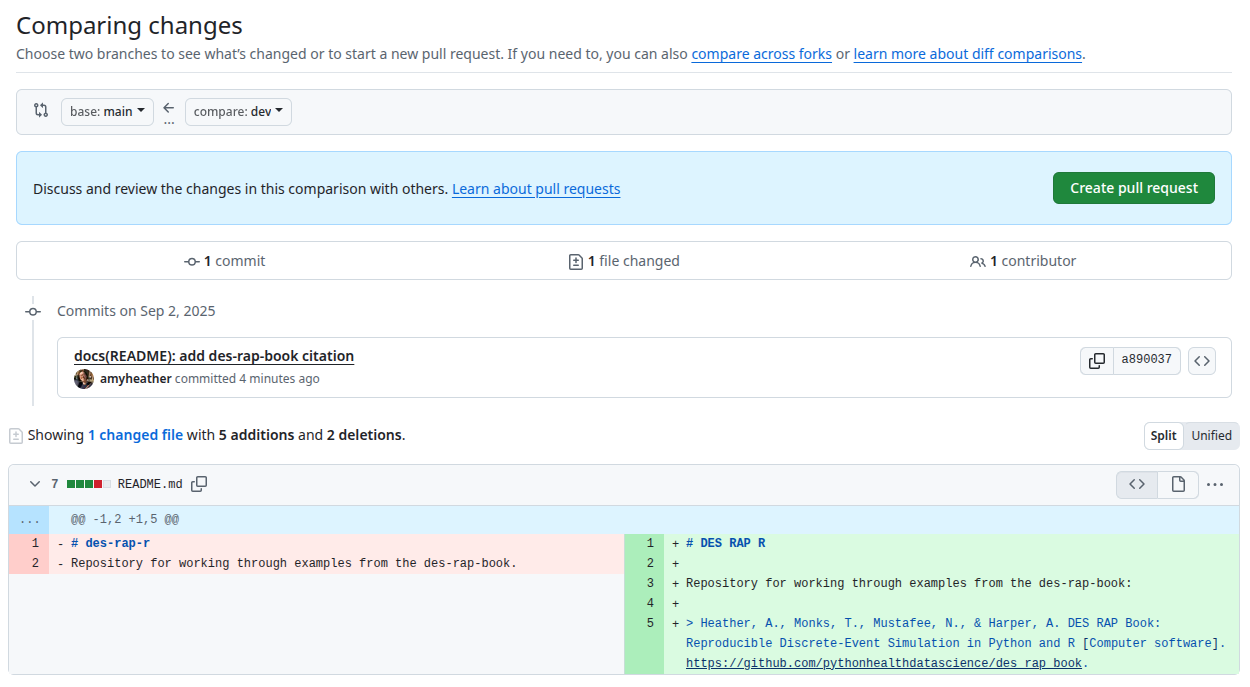
Repository for working through examples from the des-rap-book:
> Heather, A., Monks, T., Mustafee, N., & Harper, A. DES RAP Book: Reproducible Discrete-Event Simulation in Python and R [Computer software]. https://github.com/pythonhealthdatascience/des_rap_book.3. Commit the changes
To save this new version of our file to Git, we need to commit the changes. We use git add to choose which files to commit. We then write a descriptive commit message using git commit. Finally, we push the changes using git push.
git add README.md
git commit -m "docs(README): add des-rap-book citation"
git push
4. Merge the changes
Once you’ve finished committing changes to your branch (e.g. dev), the next step is to merge those changes into the main branch. There are two main ways to do this:
- Using the GitHub website - recommended for beginners and team workflows.
- Using the command line - useful if you are comfortable with Git or working independently.
Merging using the GitHub website
The easiest and most common way to merge is via a pull request on GitHub. A pull request is a way to propose merging changes from one branch into another. This lets you review your changes in a user-friendly interface, and gives others an opportunity to review and discuss them before they are added to the main project.
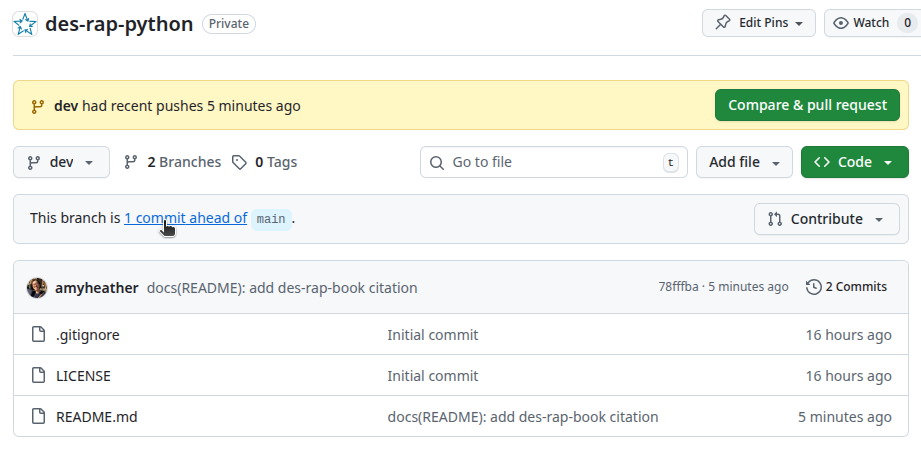
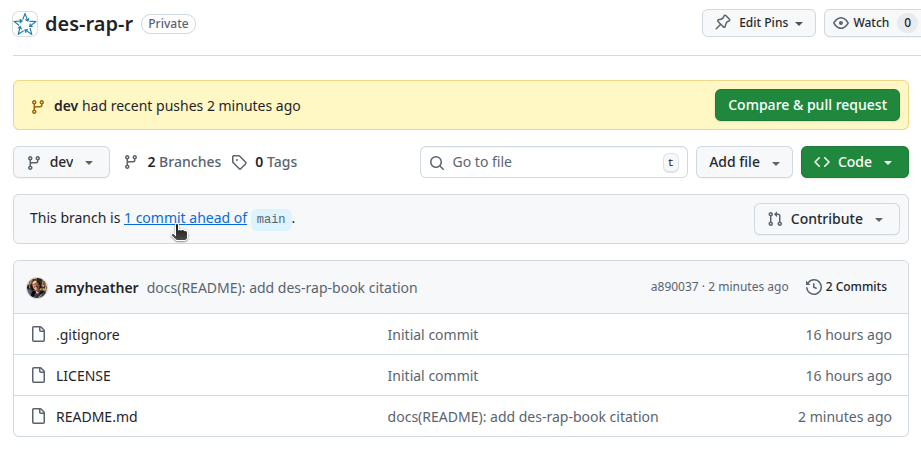
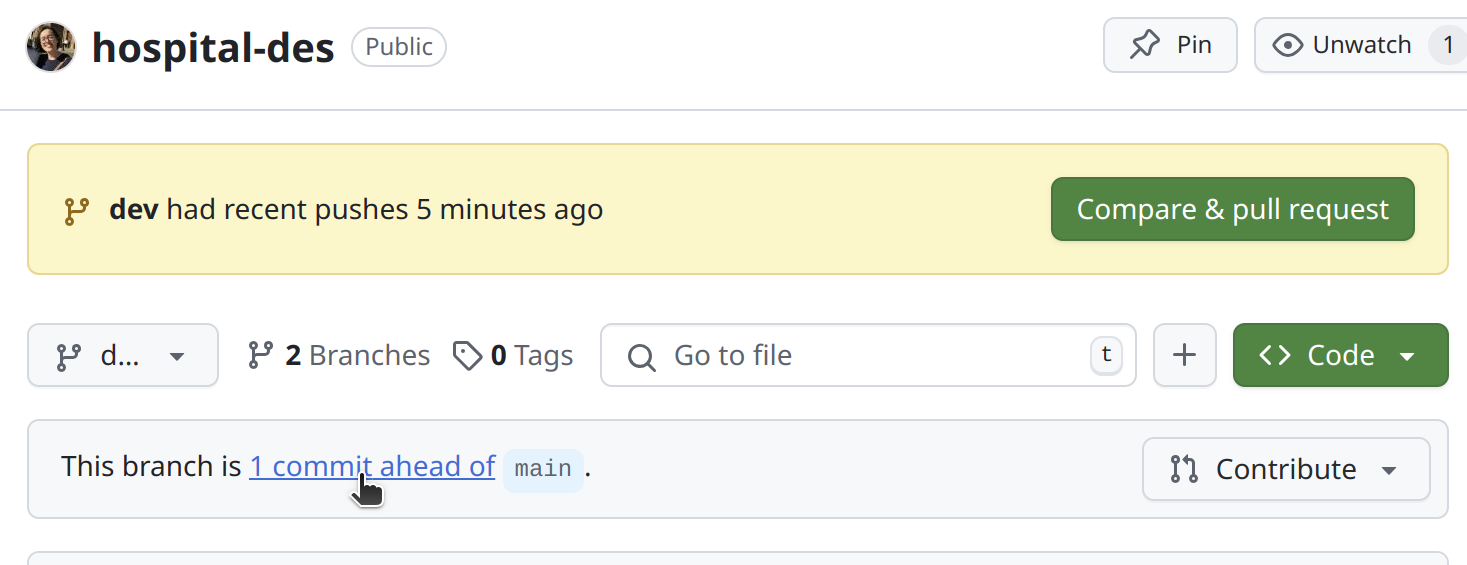
To create and merge a pull request, you should first go to your repository on GitHub. You should see that you now have multiple branches. Click on your new branch (e.g. dev) to switch to it.
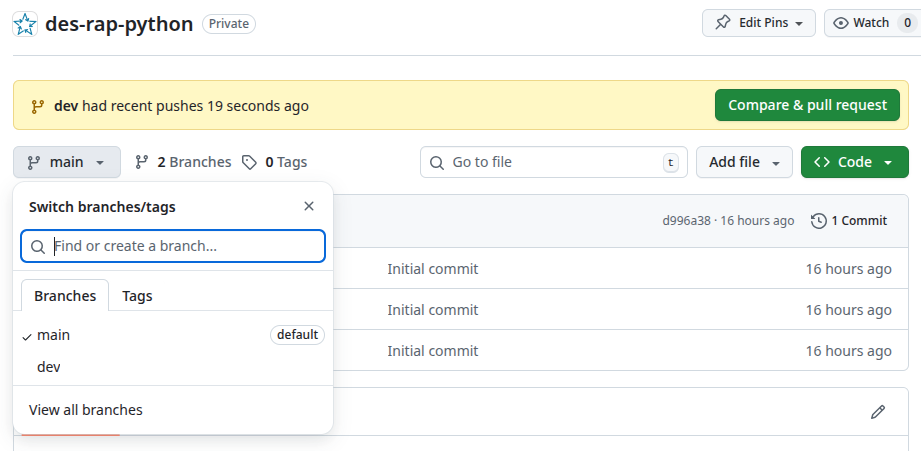
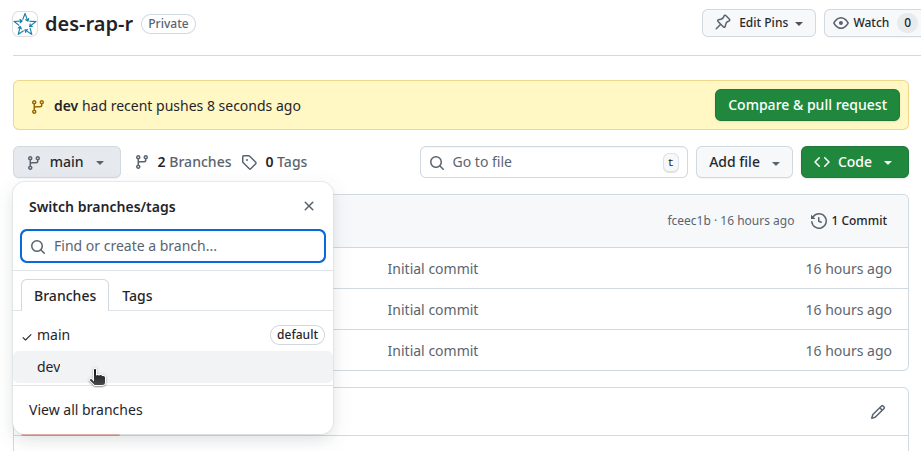
Navigate to page comparing branch to main. You can do this by clicking either:
- This branch is X commits ahead of main.
- Compare & pull request
You will be able to see side-by-side changes in the files you have modified. To create a pull request, click on the button: Create pull request .
We can modify the message or just leave as is.
Then, again, you need to click Create pull request .
If new changes have been made to the main branch since you created your branch (e.g., new commits, merges from other branches, or contributions from other collaborators) and you’ve modified the same files, you may encounter merge conflicts that need to be resolved.
If not though, you can just select Merge pull request and then Confirm merge .
Merging using the command line
Alternatively, if prefer to work from command line, you can also merge from the terminal or Git Bash. It’s important to note that this will skip some of the important benefits of pull requests. Working from the command line:
- Changes are merged without feedback or approval from others.
- There is less transparency (as pull requests have clear discussion threads / rationale for changes).
- There are no automated checks (whilst pull requests can run tests or require approvals before merging).
- Harder to track as changes are less visible in the project history.
To merge from the command line, you will first need to switch to the main branch:
git checkout mainPull the latest changes from GitHub:
git pull origin mainMerge in your branch (e.g. dev):
git merge devIf there are no conflicts, the changes will merge successfully. You can then push the updated main branch to GitHub:
git push origin main5. Close your branch
We can now delete the branch from the remote repository -

We also need to delete the branch locally. We can do this using the terminal or Git Bash.
First, switch back to main:
git checkout mainThen pull the updated main branch, which contains our merged changes:
git pullWe can then delete our local branch:
git branch -d devAnd also get the latest list of branches from the remote repository, with our old branch now removed:
git remote prune originTo continue working in the repository, simply create a new branch and continue as above.
GitHub organisations
When creating a GitHub repository, by default, it will set the owner to be your personal user account. While this works well for person projects, you will often find it better to create repositories within a GitHub organisation instead.
A GitHub organisation acts like a shared account which multiple people can own, access and collaborate on. Advantages of this are:
- One place for each project/team. Related repositories are grouped into one organisation. For example, you could have different organisations for different teams or projects, with all the relevant repositories for each.
- Shared ownership. Multiple people can have administrative access.
- Continuity. If you leave a project, repositories remain accessible to and owned by the team.
- Professional branding. Repositories appear under the organisation name rather than your personal username.
To create a GitHub organisation…
1. Open settings
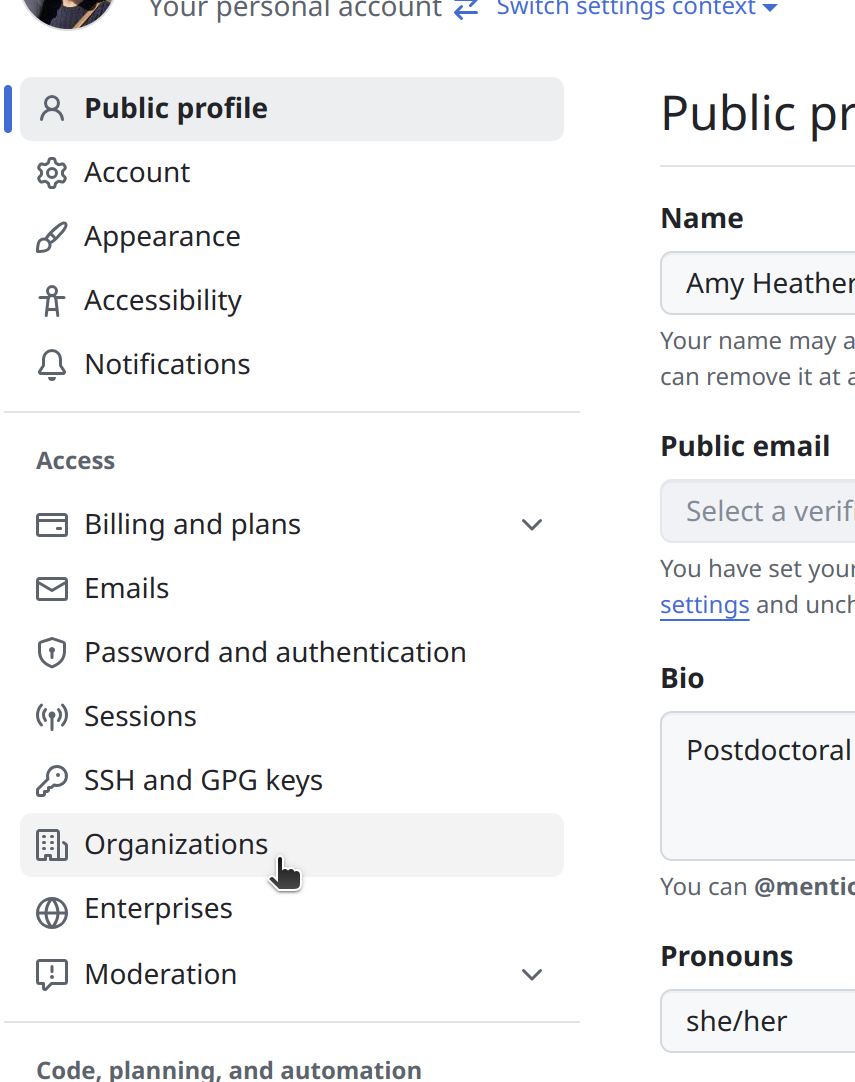
In the top-right corner, select your profile photo, then click “Settings”.

Then select “Organizations” under the Access section in the sidebar.
2. Make new organisation
In the top-right corner, select “New organization”.
3. Choose a plan
For example, simply select the Free plan.
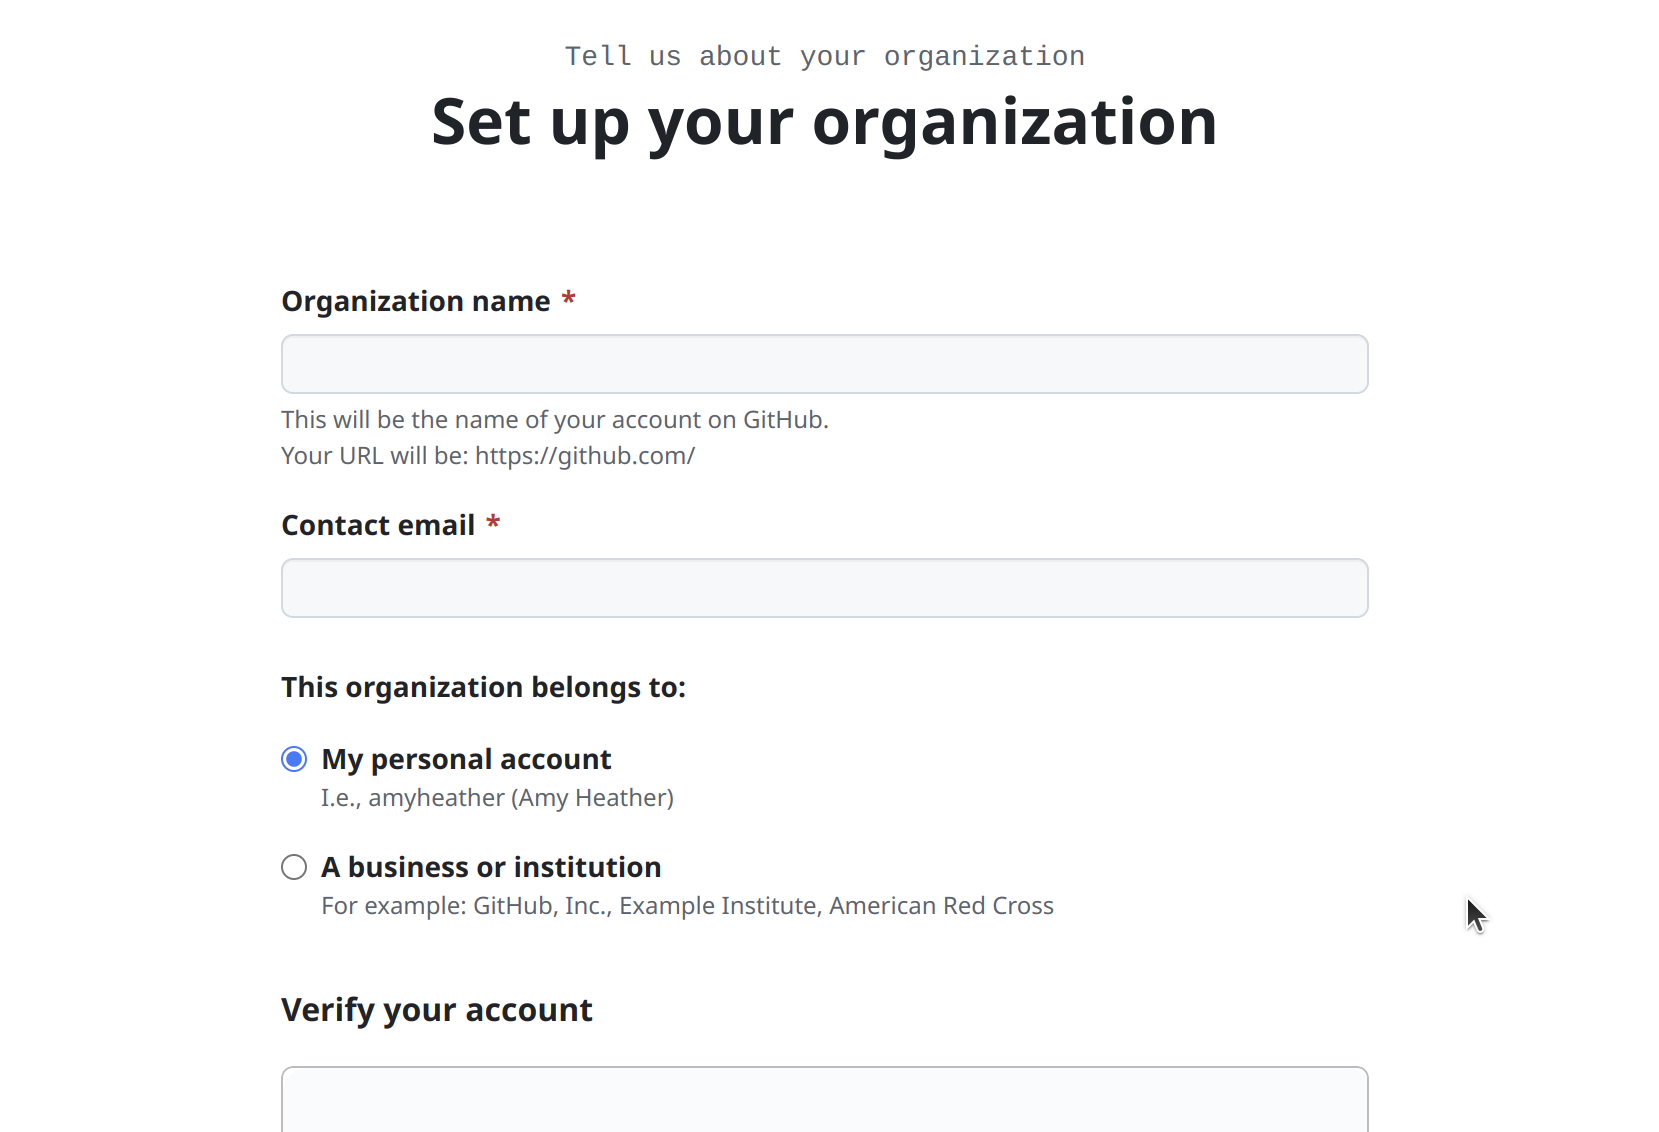
4. Enter your organisation details
It will ask for a name and contact email. You can typically then select that the organisation belongs to your personal account. Follow the prompts to create the organisation. You can then add other GitHub users as owners or collaborators.
Test yourself
If you haven’t already, have a go at setting up a GitHub repository to use when working through this book.
We will provide examples in both Python and R - following along in your own repository helps build understanding and practial skills.
Steps to practice
- Create a repository (e.g.
des-rap-python) withREADME.md,.gitignoreandLICENSE.
- Create a repository (e.g.
des-rap-r) withREADME.md,.gitignoreandLICENSE.
Clone the repository.
Create and switch to a branch.
Make a commit. For example, edit your
README.md.Merge changes.
Delete the branch.
If you plan to explore both languages, make separate repositories for each, as their project structures and workflows differ.
Refer back to the examples and guidance in the tutorial above.
Further information
-
Includes some great introductory videos on git and version control.